
Exporting
Last updated
Export writes a composition out as a file. One dialogue collects the settings, and a queue does the writing.
Export a composition
Section titled “Export a composition”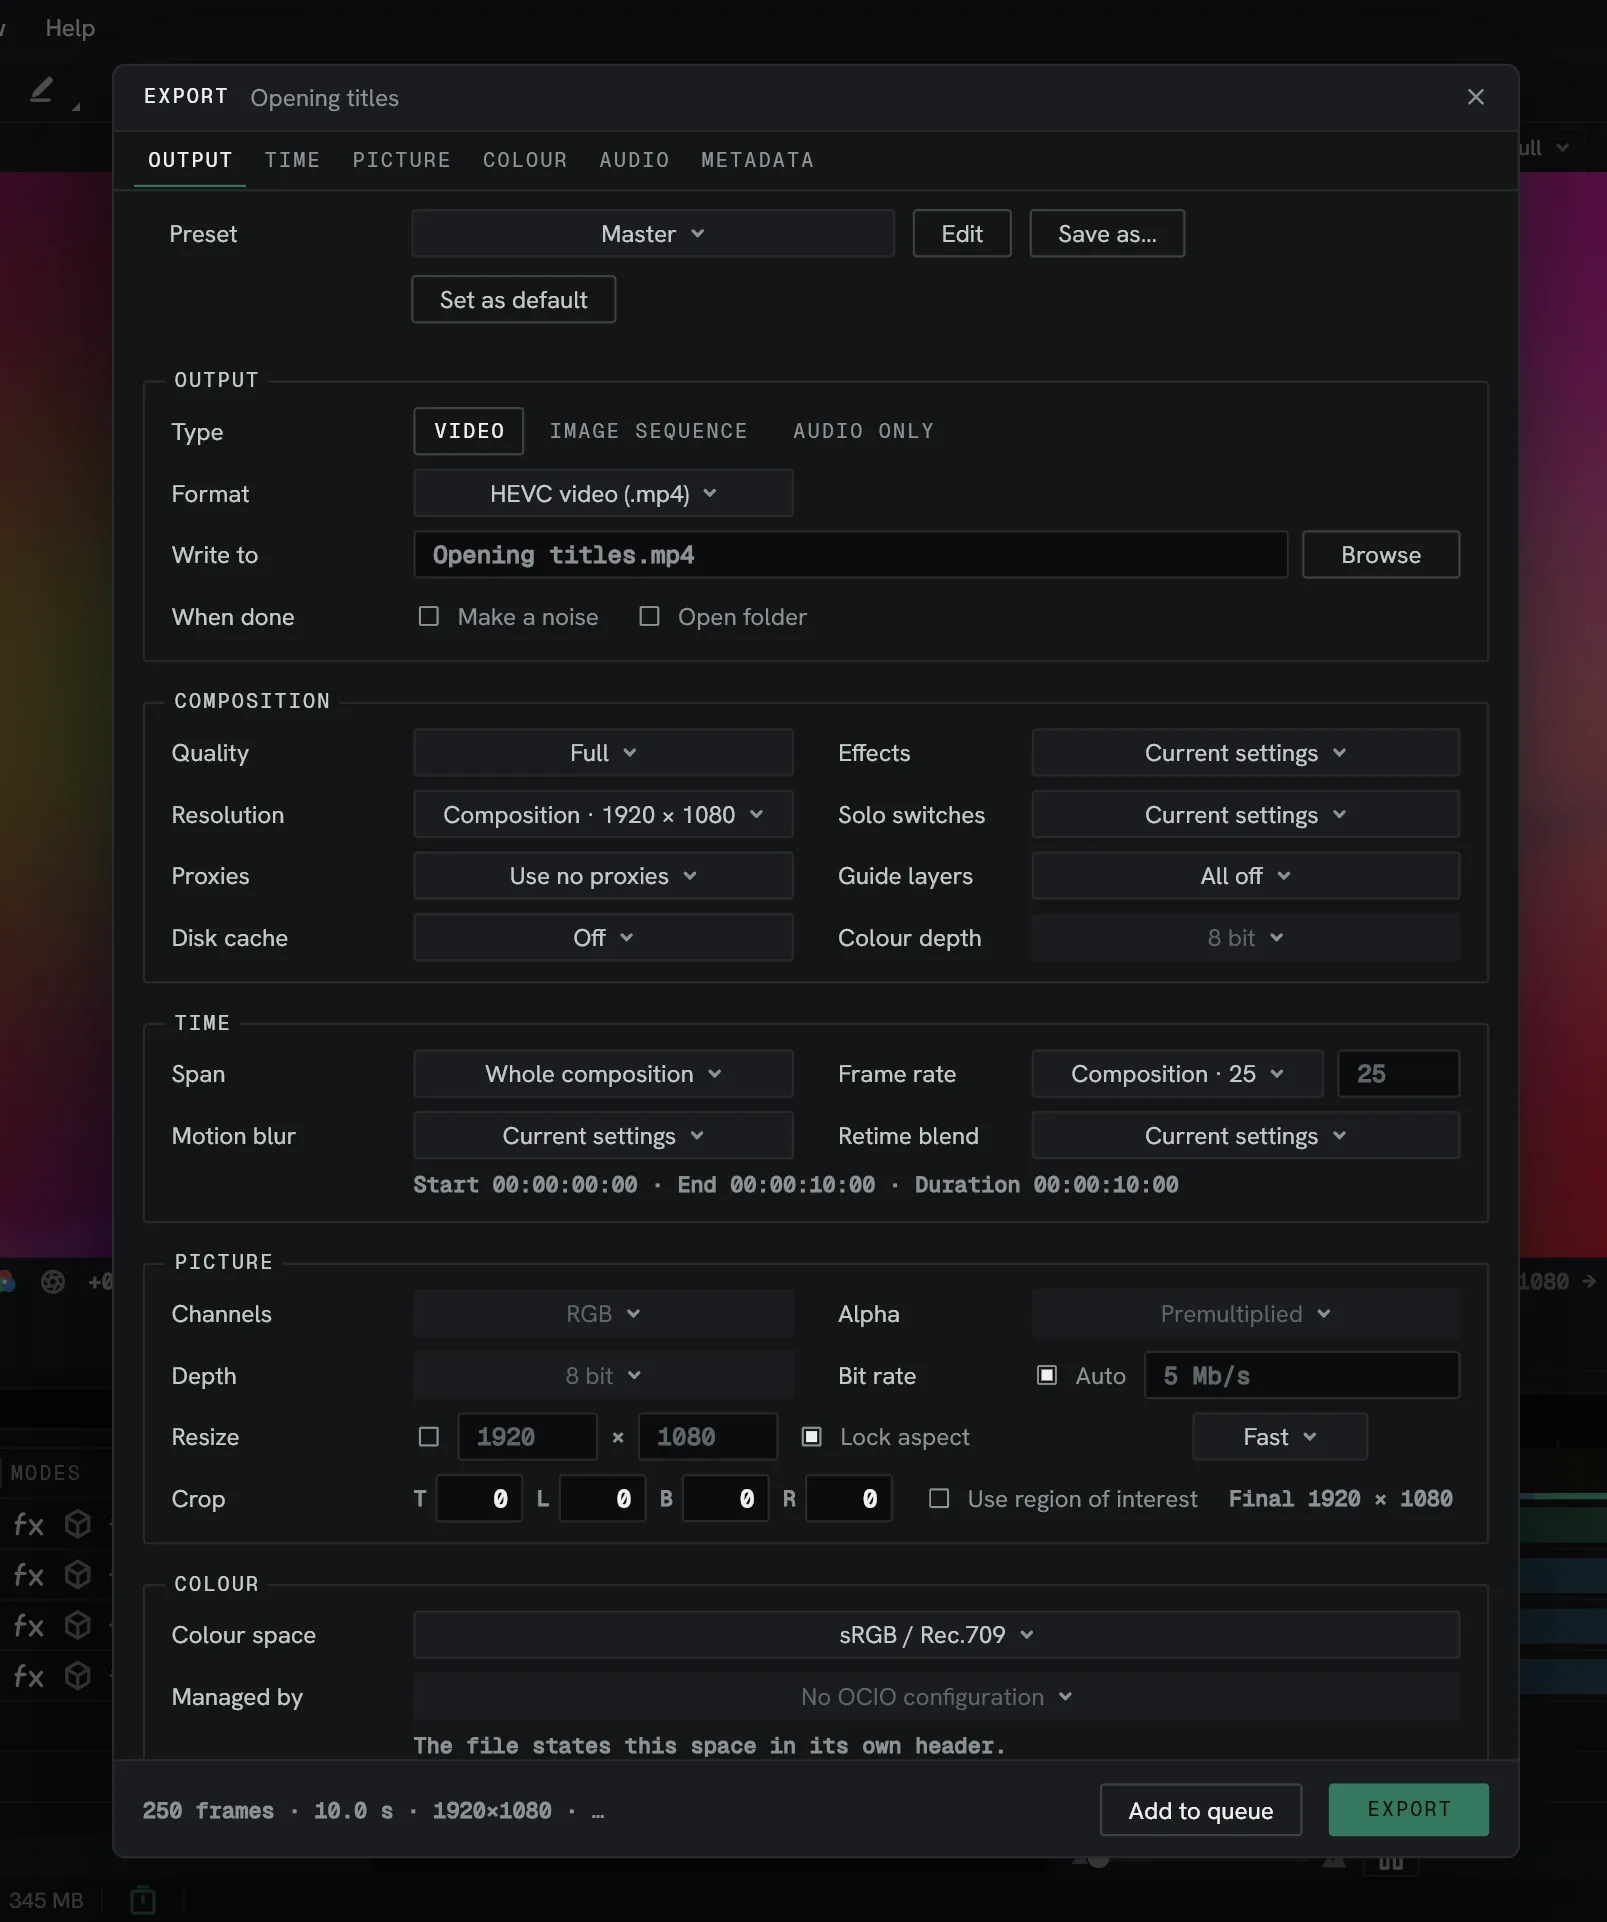
- Front the composition, or select it in the Project panel.
- Choose File ▸ Export, or press
Ctrl+Alt+M. - Pick a preset, or set the fields yourself.
- Choose where to write with Browse.
- Press EXPORT.
Composition ▸ Add to export queue (Ctrl+M) opens the same dialogue. EXPORT sets
the queue running; Add to queue leaves the item waiting for you to start it.
The dialogue
Section titled “The dialogue”The dialogue is a single scrolling page. The tab row at the top follows whichever section you have scrolled to, and clicking a tab scrolls that section into view.
| Section | What it holds |
|---|---|
| Output | Video, image sequence or audio only; the format; where to write; and whether to make a noise or open the folder when it finishes. |
| Composition | Quality, resolution, whether effects and solo switches are honoured, proxies, guide layers, the disk cache and colour depth. Part of the Output tab. |
| Time | The span, the frame rate, and overrides for motion blur and Retime blend. |
| Picture | Channels and alpha, depth, bit rate, resize, crop, and the resampler. |
| Colour | The space the file is written and tagged in. |
| Audio | Whether sound is written, at what sample rate, sample width, channel layout and bit rate. |
| Metadata | Title, author, copyright, comment and created, plus any field of your own. |
The frame rate starts as the composition’s own; the span starts as the work area where one is set and the whole composition where it is not.
The footer states what pressing the button would produce — frames, length, size, rate, and an estimate of the file. When a setting is one the format cannot carry, the footer says so, and both buttons go quiet until it is fixed.
Presets
Section titled “Presets”A preset fills in every section at once.
| Preset | What it is |
|---|---|
| Master | The composition’s own frame and rate, HEVC at a worked-out bit rate, everything on. |
| YouTube 1080p60 | 1920×1080, H.264, 16 Mb/s target. |
| YouTube 1440p60 | 2560×1440, HEVC, 25 Mb/s target. |
| YouTube 4K60 | 3840×2160, HEVC, 45 Mb/s target. |
| Vertical 1080×1920p60 | H.264 for shorts and reels. |
Those five ship with Lumit and cannot be changed. Save as… stores the settings in force under a name of your own; Edit renames the one showing, and offers to delete it. Your presets live with the application rather than with the project.
Set as default remembers the preset and format showing as what the dialogue opens on next time. Where exports are written lives in Edit ▸ Settings ▸ Export: ask each time, beside the project, or always the same folder, with a filename template.
What each format can hold
Section titled “What each format can hold”A control the chosen format cannot use is disabled.
| Format | Picture | Sound | Alpha | Depth | Bit rate | Colour space | Metadata |
|---|---|---|---|---|---|---|---|
| H.264 (.mp4) | Yes | Yes | No | 8 bit | Yes | Stated in the file | Yes |
| HEVC (.mp4) | Yes | Yes | No | 8 bit | Yes | Stated in the file | Yes |
| PNG sequence | Yes | No | Yes | 8 or 16 bit | No | None stated | No |
| TIFF sequence | Yes | No | Yes | 8 or 16 bit | No | None stated | No |
| M4A (AAC) | No | Yes | — | 16 bit | Yes | — | Yes |
| WAV | No | Yes | — | 16 or 24 bit | No | — | Yes |
An image sequence writes one numbered file per frame beside the name you chose. A sequence has no container to carry metadata, so that section is disabled.
Audio only
Section titled “Audio only”The third chip on the Output row writes sound and no picture — the composition’s finished mix as an M4A or a WAV. The Audio section sets the sample rate (44.1, 48 or 96 kHz), the width (16 bit, or 24 for the uncompressed forms) and the layout (stereo, or folded down to mono).
Colour space
Section titled “Colour space”The Colour section names the space the file is written and tagged in: sRGB / Rec. 709, Linear, Rec. 709, Rec. 2020 or Display P3.
Where the project names a colour configuration, that configuration’s own output spaces appear under a heading of their own. A file written through one of those is left untagged. A space the configuration cannot use is listed and disabled, with the reason on hover.
The render settings
Section titled “The render settings”Two rows in the Composition group decide what the export reads:
- Proxies — Use no proxies. See Proxies.
- Guide layers — All off.
Motion blur and Retime blend in the Time section are overrides on the export’s own copy of the composition.
The queue
Section titled “The queue”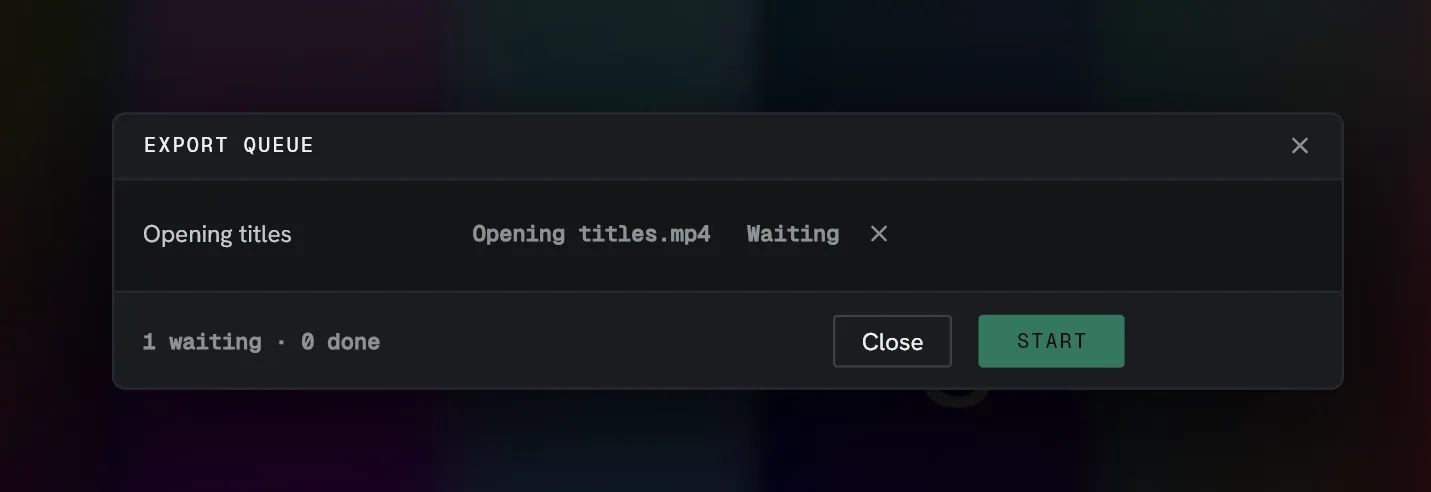
Both buttons put the item in the queue, and the queue window opens on top. Window ▸ Export queue reopens it later.
One export runs at a time and the rest wait. Each row says which composition it came from, what it is writing, and how it is progressing: Waiting, the frame it is on, Done, or the failure.
- Drag a waiting row to move it up or down. A row that is running, has run, or has failed cannot be picked up.
- The × on a row cancels it while it is writing.
An item’s settings are captured the moment it is queued, so working on the project afterwards does not impact the export.
Export does not block
Section titled “Export does not block”You can carry on editing while an export writes. The status strip at the bottom of the window says which frame it is on, and has a Cancel.