
Your first composition
Last updated
The walkthrough below will teach you how to go from an empty project through to exporting. Each step links to the doc page that has more specific details.
1. Make a composition
Section titled “1. Make a composition”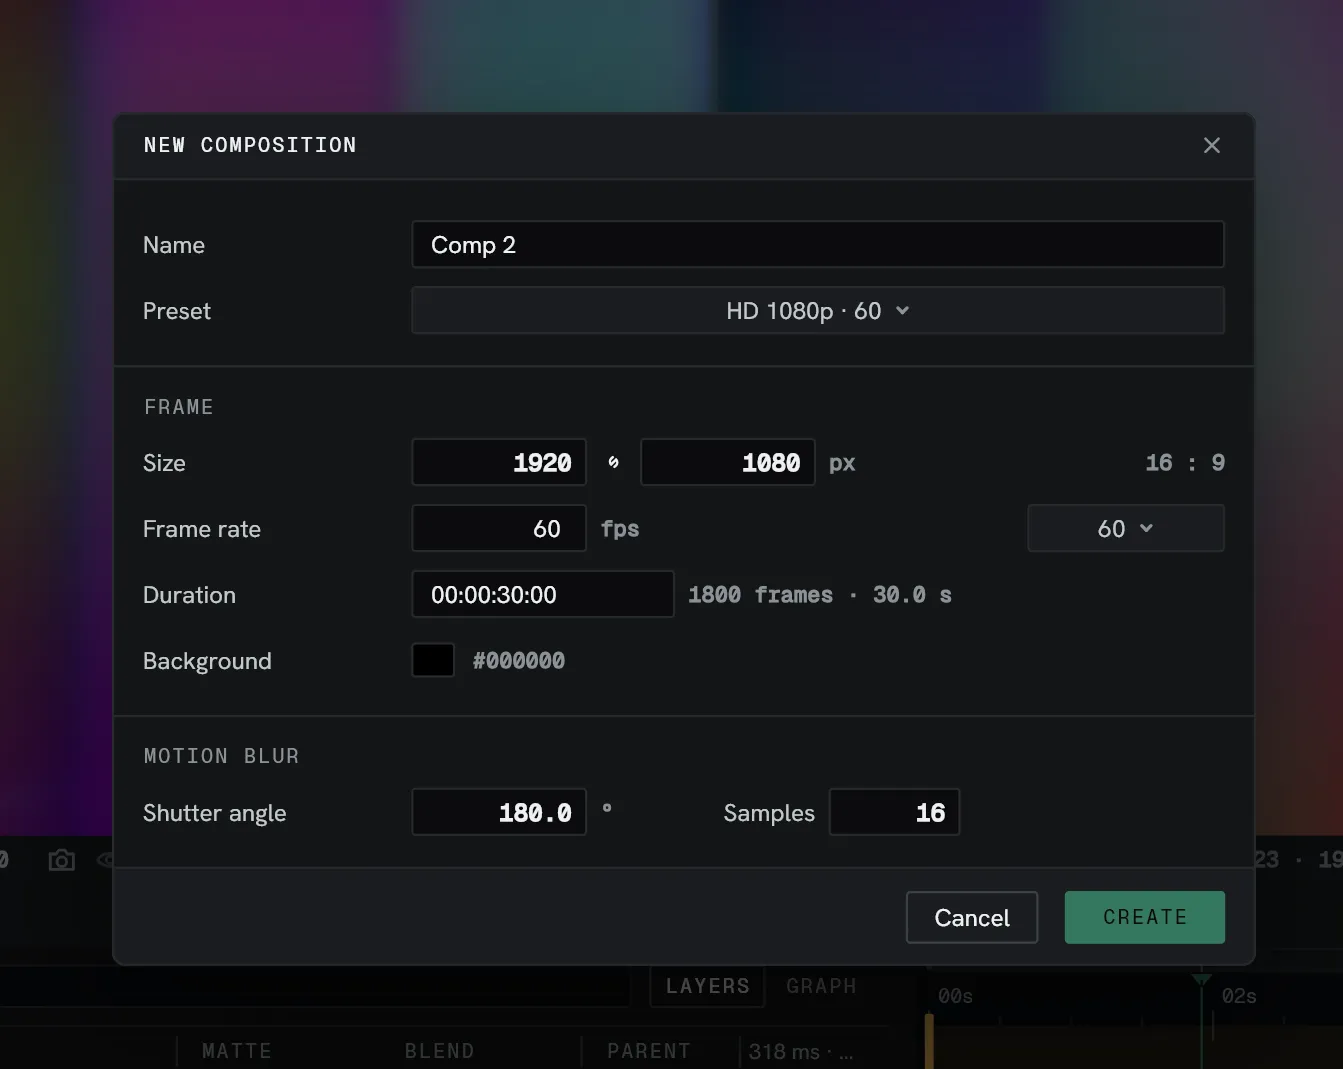
A composition is a timeline with a fixed resolution, frame rate, and duration. Everything you create will be based inside at least one of these.
- Choose Composition ▸ New composition.
- Set the resolution, frame rate, and duration.
- Confirm.
See Compositions.
2. Bring in your media
Section titled “2. Bring in your media”Import the files you plan to use. They appear in the Project panel as assets.
- Choose File ▸ Import footage.
- Select one or more files.
Dragging files onto the Project panel from your file manager does the same thing.
Lumit never modifies files you import. The project stores a reference to the file.
See Importing media.
3. Add a layer
Section titled “3. Add a layer”Drag an asset from the Project panel onto the timeline. It becomes a layer.
Each item occupies its own layer, and items at the top appear on top of the layers below them. Layers like solids, shapes, text, etc. that don’t come from imported media can also be added to the composition.
See Layers.
4. Move it
Section titled “4. Move it”Every layer has transform properties. It holds information such as the anchor point and position, along with scale, rotation and opacity. Twirl the layer open in the Timeline to see the transform row, and twirl that to view each individual property.
See Transforming layers.
5. Animate it
Section titled “5. Animate it”
Turn on the stopwatch beside a property. From then on, Lumit records a keyframe whenever you change the value at a new time.
- Turn on the stopwatch beside Position.
- Move the playhead to where you want a new keyframe.
- Set the new value in the property’s row in the Timeline, or in Effect Controls. Transform properties like position or scale can also be set directly in the Viewer.
See Keyframes, and then the graph editor for shaping the motion between them.
6. Watch it back
Section titled “6. Watch it back”Press play or the spacebar. The cache bar under the time ruler shows which frames are cached and currently ready for playback.
See Preview and playback.
7. Export it
Section titled “7. Export it”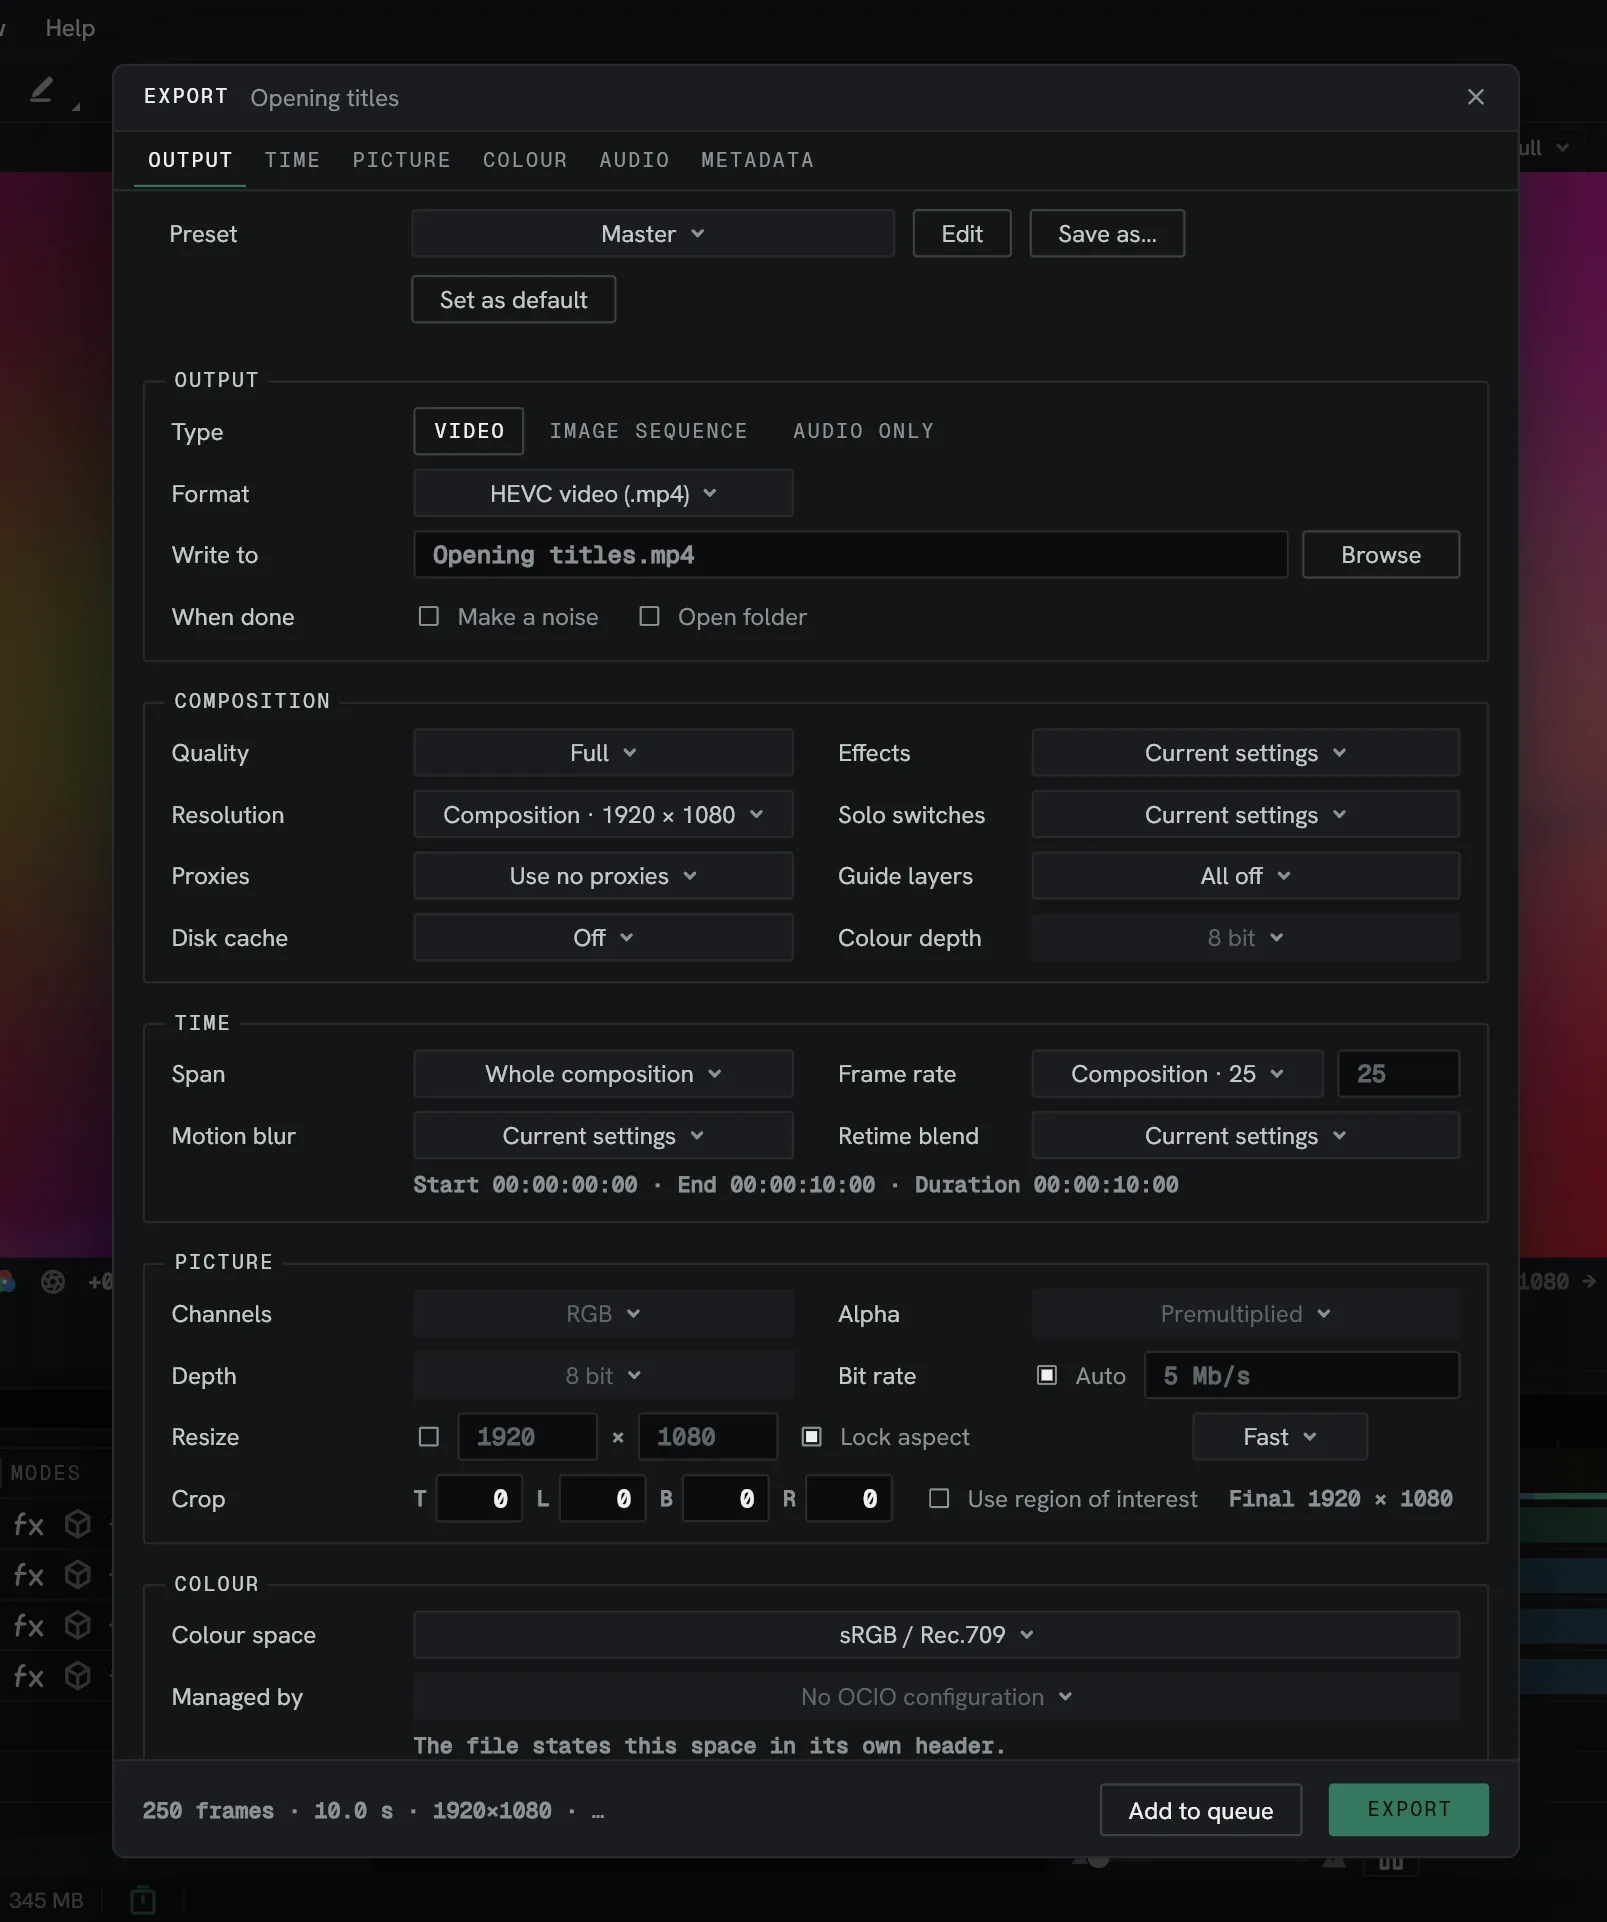
Choose File ▸ Export. Pick a preset — Master is the composition’s own frame and rate — choose where to write with Browse, and press EXPORT. The queue window opens and the writing starts there.
The interface is not blocked while an export runs, so you can carry on working as Lumit writes the file.
See Exporting.