
Editing many keyframes at once
Last updated
Lumit treats a selection of keyframes as a block, so stretching its timing or easing the selection is a single drag or click.
Work in the Timeline’s Layers mode. Everything below is the same in Graph mode.
1. Get the keyframes on screen
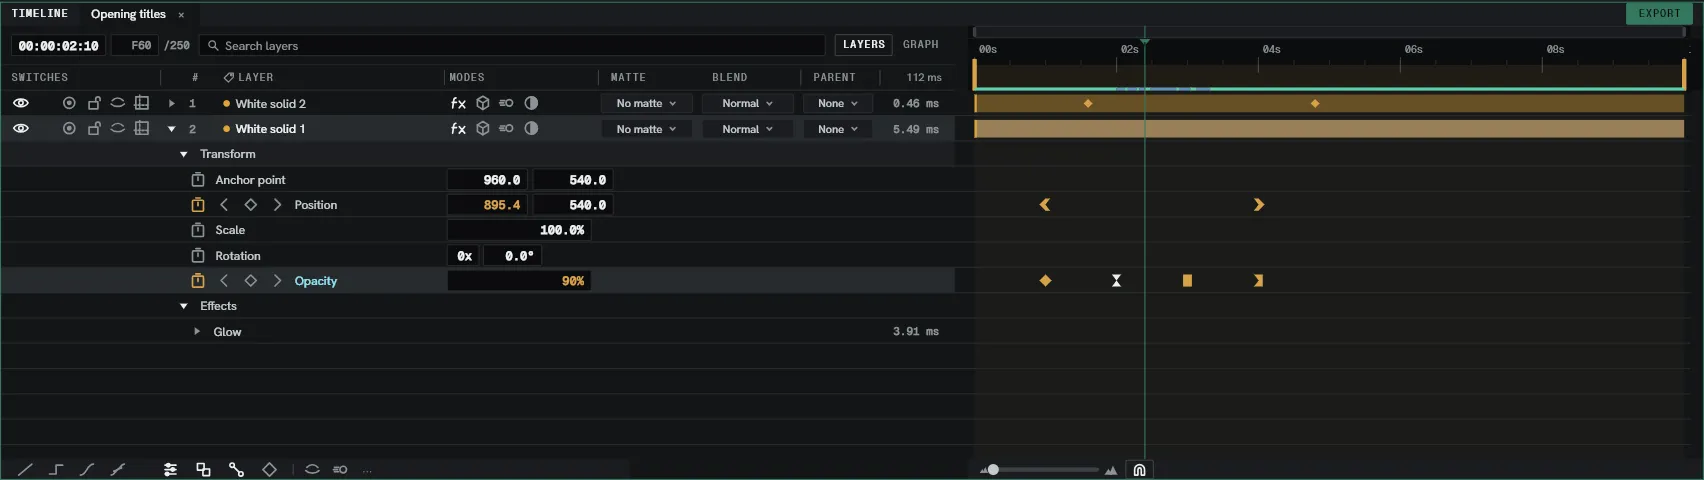
Section titled “1. Get the keyframes on screen”- Select the layer and press
U. It opens showing only the rows that carry keyframes. Press it again to shut the layer.
2. Select them
Section titled “2. Select them”Drag on empty space in the lane and a selection will extend from where you began dragging. Every keyframe it covers is selected on release.
- Hold
ShiftorCtrlas the drag begins and the selection adds to what you already have. - Click empty lane space to select nothing/deselect.
Two or more keys become a block: a box with a small handle at each end, and a badge saying
how many keys it holds and how many frames it spans — 12 keys · 48 f.
3. Slide the whole run
Section titled “3. Slide the whole run”Drag any keyframe in the selection and the whole block moves with it.
The magnet on the bar under the lanes decides whether the run lands on whole frames. With it on, the key in your hand snaps and the rest follow.
4. Stretch the timing
Section titled “4. Stretch the timing”Take hold of a handle at either end of the box and drag.
- The end you did not touch stays exactly where it is.
- The end you dragged moves to where you put it.
- Every key inbetween retains its relative position between the start and end points.
The dragged end snaps to the same things a single key does, such as: a whole frame, a marker, the playhead, a key on another row.
5. Shape the movement
Section titled “5. Shape the movement”Click the block’s badge, or EASE on the bar under the lanes, and the Ease popover opens on the selection.
| Row | What it asks |
|---|---|
| Curve | A named shape — easy ease, slow start, slow finish, anticipate, overshoot, snap, heavy ease, or one you saved. |
| Influence | How far each side of the curve reaches, in per cent, in and out separately. |
| Stagger | Frames between one row’s keys and the next, top down or bottom up. Zero leaves every row where it is. |
Apply applies the shape and the box remains selected. Open graph keeps the same selection in the graph editor, where the curve can be drawn by hand instead of chosen.
6. The rest of the strip
Section titled “6. The rest of the strip”The bar at the bottom of the timeline carries the commands that act on whatever keys are selected:
- LINEAR, HOLD, EASE, BEZIER — Adjusts interpolation of every selected key.
7. When one axis needs its own timing
Section titled “7. When one axis needs its own timing”Position and Anchor point come as one row with a box per axis, and one stopwatch: keying the row keys both axes together.
Right-click the property’s name in the outline and choose Separate axes. The row becomes a row per axis, each with its own stopwatch, its own keyframes and its own curve in the graph editor. Combine axes on the same menu puts them back.
Scale starts linked instead. Unlink axes gives it two boxes on one row; Separate axes further separates them into two rows.