
Effects
Last updated
An effect is one stage in a layer’s effect stack. The stack composites top to bottom, applying in that order.
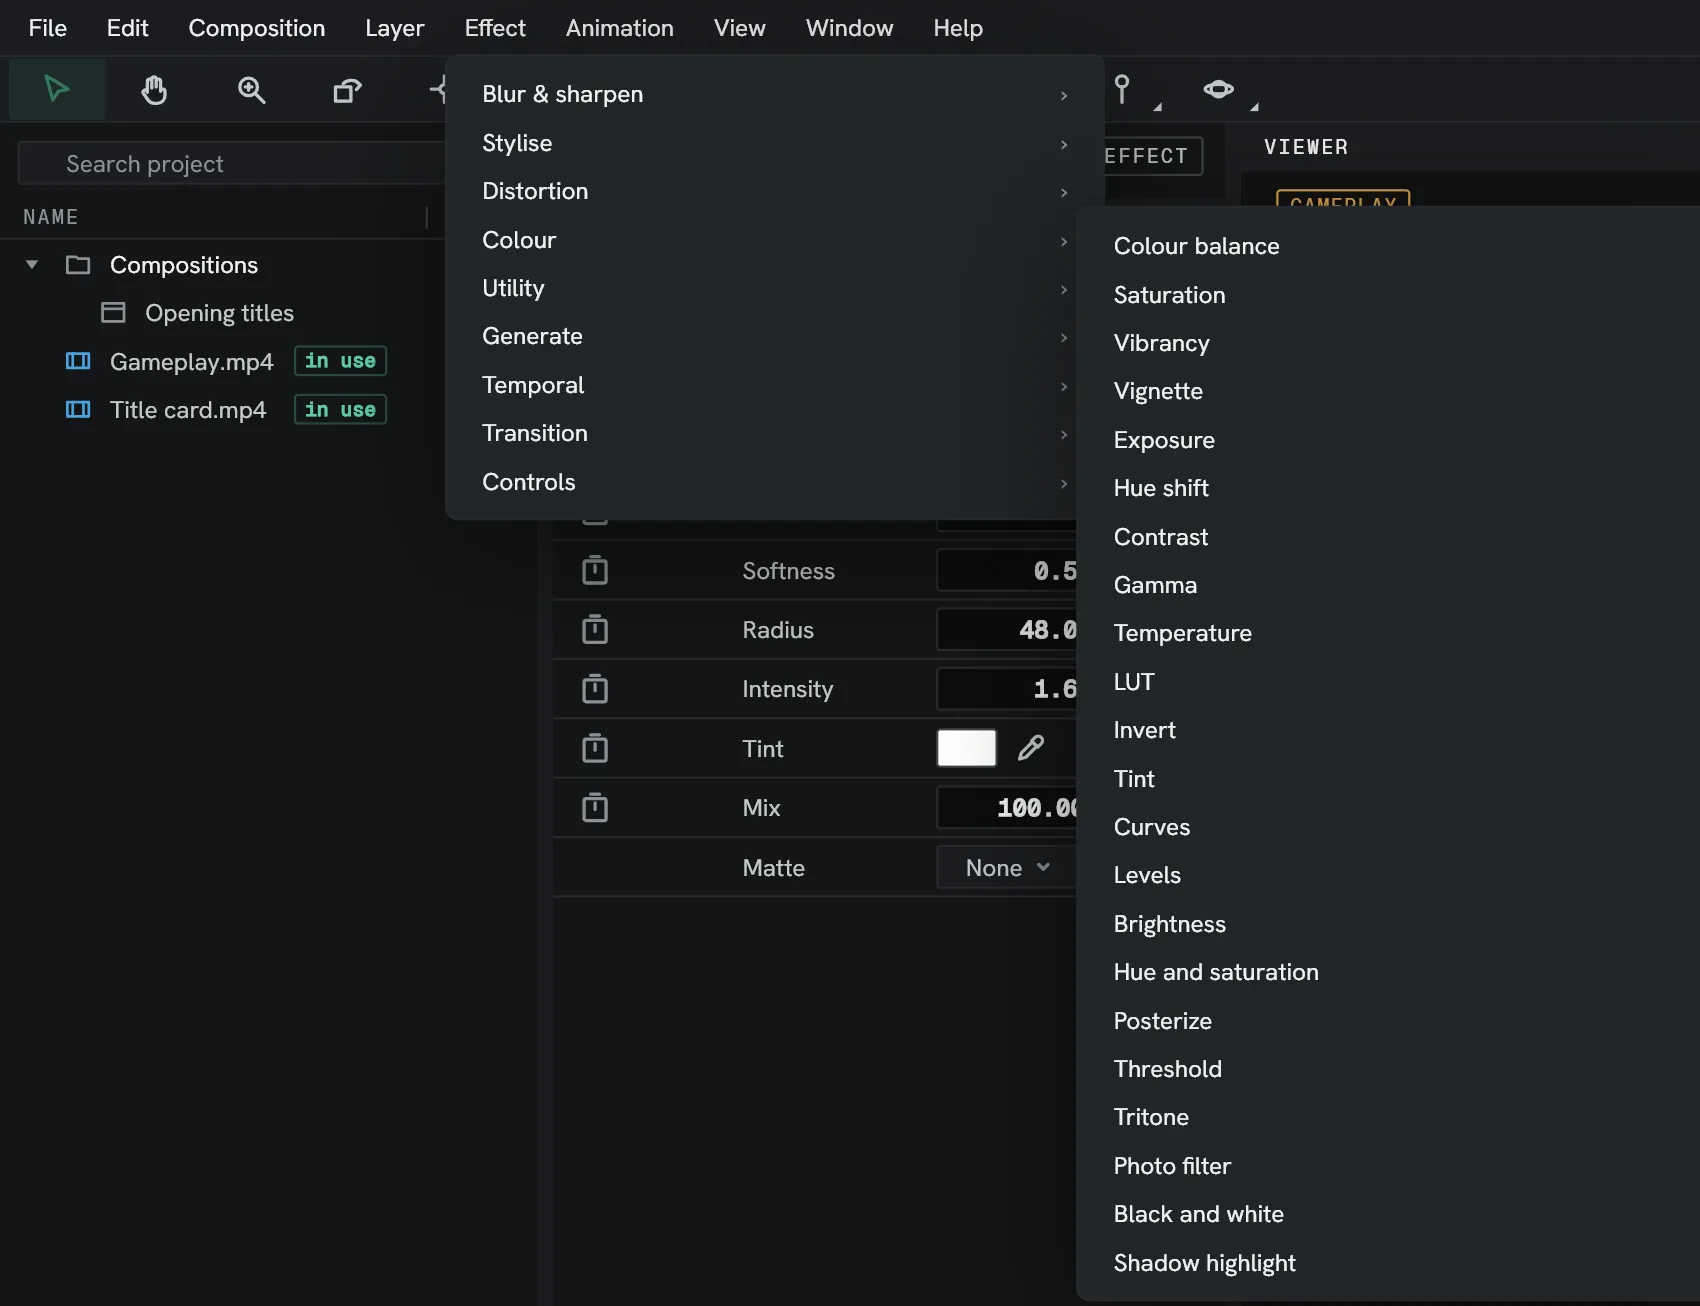
Apply an effect
Section titled “Apply an effect”- Select a layer.
- Choose Effect, then a category, then the effect.
You can also choose effects via the Effects console, or dragged onto a layer from the Effects & presets panel. With nothing selected, the whole menu is disabled.
Edit the parameters
Section titled “Edit the parameters”Select the layer and open the Effect Controls panel. Every parameter there can be animated: turn on its stopwatch to begin. See Keyframes.
Order matters
Section titled “Order matters”Effects run in stack order. An exposure ahead of a glow does not look like a glow ahead of an exposure. Drag an effect up or down the stack to reorder it.
Apply one effect to many layers
Section titled “Apply one effect to many layers”Select several layers and apply an effect, and each of them gets its own copy — from the Effect menu, the Effects console or the Effects & presets panel alike.
Effects on adjustment layers apply to the composite of everything below them. See Layers.
Every effect has a Matte
Section titled “Every effect has a Matte”Every effect’s controls have a layer picker labelled Matte, with a Channel dropdown and an Invert checkbox beside it. Channel picks what is read from the matte layer: its brightness by default, or its alpha or one of the colour channels. Select a layer and that layer’s brightness decides how much of the effect each pixel gets. White applies the effect in full and black gets none. Invert reads the same picture the other way round.
A matte is different from a mask on the effect. A mask can hide what an effect does, whereas a matte drives the effect itself. For a handful of effects it applies more than just strength:
- Gaussian blur narrows its radius.
- Turbulent displace scales its turbulence.
- Glow gates pixels used to find areas of glow.
- Depth of field reads it as a depth pass.
- Lens flare reads it as where to find its light sources.
- Set matte reads it as the alpha itself, which is the whole effect.
Lumit renders the matte layer on its own at the composition’s size. Beside the picker, the Layer source dropdown has the option to read that layer raw, with its masks, or with its effects applied. If it is the same layer the effect is on, it reads that layer’s own picture at that point in the stack.
The built-in roster
Section titled “The built-in roster”Each effect has its own page under Effects, with a table of every parameter and its range, default and units.
| Category | What the family is for |
|---|---|
| Blur & sharpen | Softening and detail lift. |
| Colour | Grading: exposure, balance, contrast, and colour altering. |
| Distortion | Warp pixels. |
| Generate | Effects that make a picture instead of changing one. |
| Stylise | Glow, flare, relief and blocks. |
| Temporal | Effects that read frames at other times, or change which frame is drawn. |
| Transition | Wipes, driven by a completion parameter you keyframe. |
| Utility | Keying, mattes, transform, and other useful effects. |
| Compositing | Merge, Switch and Time offset. They exist only inside a node graph composition, and the Effect menu never offers them. |
The three kinds of motion blur
Section titled “The three kinds of motion blur”These are easy to confuse:
| What | Where | Does |
|---|---|---|
| Motion blur switch | A layer switch | Smears one layer based on its transforms. |
| Motion blur effect | An effect | Calculates estimated motion vectors for what it’s applied on, and generates motion blur based on that. |
| Accumulation motion blur effect | An effect | Re-renders the scene below at sub-frame times and averages out to calculate almost true to life motion blur. Slow, as every sample is a full render. |
Plugins
Section titled “Plugins”OFX and LFX plugins will appear beside the built-in effects.